[HATEOAS와 Self-Describtive Message 적용]_04_스프링 REST Docs 적용
스프링 REST Docs 적용
REST Docs 자동 설정
- @AutoConfigureRestDocs
RestDocMockMvc 커스터마이징
- RestDocsMockMvcConfigurationCustomizer 구현한 빈 등록
- @TestConfiguration
테스트 할 것
- API 문서 만들기
- 요청 본문 문서화
- 응답 본문 문서화
- 링크 문서화
- profile 링크 추가
- 응답 헤더 문서화
테스트 코드에서 스프링 REST Docs 적용
- 의존성 추가
<dependency>
  <groupId>org.springframework.restdocs</groupId>
  <artifactId>spring-restdocs-asciidoctor</artifactId>
  <version>${spring-restdocs.version}</version>
</dependency>
- REST Docs를 만들 테스트에 REST Docs 설정
public class EventControllerTests {
    @Autowired
    private WebApplicationContext ctx;

    @Rule
    public JUnitRestDocumentation restDocumentation = new JUnitRestDocumentation();

    @Before
    public void setup() {
        this.mockMvc = MockMvcBuilders.webAppContextSetup(ctx)
                .apply(documentationConfiguration(this.restDocumentation))
                .build();
    }
→ @AutoConfigureRestDocs 애노테이션만 추가해서는 실행이 안돼서 문서(Setting up your JUnit 4 tests) 참고
애노테이션 추가로 안된 이유
테스트 setup()에서 JUnitRestDocumentation 적용코드가 별도로 들어가 있어서 적용되지 않음. (오버라이딩 되는 것인가??)
- MockMvc에 REST Docs 연동
.andDo(document("create-event"))
@Test
@TestDescription("정상적으로 이벤트를 생성하는 테스트")
public void createEvent() throws Exception {
  EventDto event = EventDto.builder().build();

  mockMvc.perform(post("/api/events/")
                  .contentType(MediaType.APPLICATION_JSON)
                  .andDo(print())
                  .andExpect(status().isCreated())
                  .andExpect(jsonPath("_links.update-event").exists())
                  .andDo(document("create-event")) //응답결과로 스니펫 생성
                  ;
}
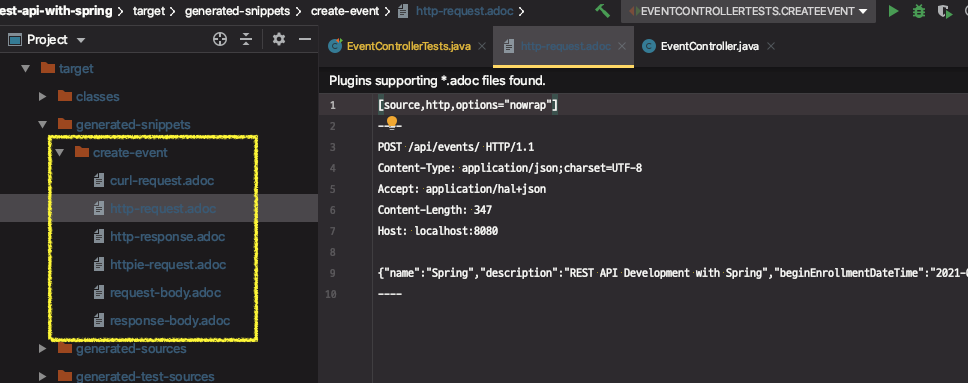
- 테스트 성공하면 스니펫이 생성된다.

→ 포맷팅이 안돼있어서 보기가 불편하다.
- 포맷팅하려면 REST Docs를 커스터마이징 해야한다.
public class EventControllerTests {
    @Autowired
    private WebApplicationContext ctx;

    @Rule
    public JUnitRestDocumentation restDocumentation = new JUnitRestDocumentation();

    @Before
    public void setup() {
        this.mockMvc = MockMvcBuilders.webAppContextSetup(ctx)
                .addFilters(new CharacterEncodingFilter("UTF-8", true))  // 필터 추가
                .apply(documentationConfiguration(this.restDocumentation).operationPreprocessors()
                        .withRequestDefaults(prettyPrint()) //request 본문을 예쁘게 출력
                        .withResponseDefaults(prettyPrint())) //response 본문을 예쁘게 출력
                .alwaysDo(print())
                .build();
    }
}
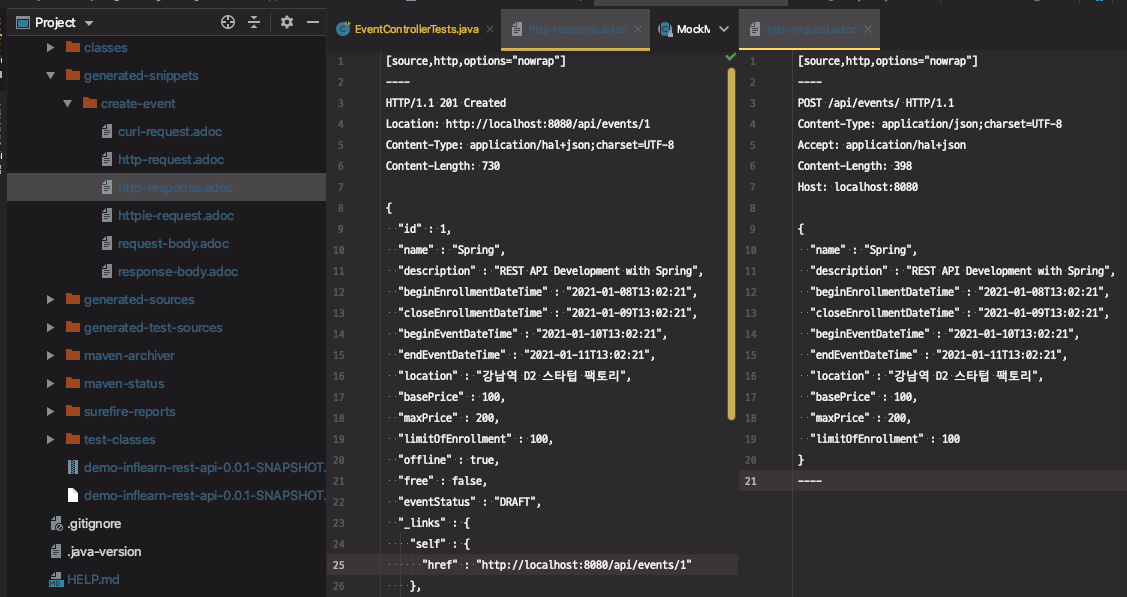
- 다시 테스트 실행
⇒ 매번 테스트 실행할 때마다 기존 스니펫은 오버라이딩 된다.
가독성 좋게 포맷팅돼서 보여준다.

RestDoc 설정파일을 만들어서 애노테이션으로 커스터마이징
- RestDocMockMvc 커스터마이징
-
RestDocsMockMvcConfigurationCustomizer 구현한 빈 등록
-
인터페이스 구현체를 만들어서 반환
MockMvcRestDocumentationConfigurer를 구현하면 된다.
-
-
@TestConfiguration
@TestConfiguration //테스트에서만 사용하는 설정임을 알려주는 애노테이션
public class RestDocsConfiguration {

    @Bean
    public RestDocsMockMvcConfigurationCustomizer restDocsMockMvcConfigurationCustomizer() {
        return new RestDocsMockMvcConfigurationCustomizer() {
            @Override
            public void customize(MockMvcRestDocumentationConfigurer configurer) {
                configurer.operationPreprocessors()
                        .withRequestDefaults(prettyPrint())     //request 본문을 예쁘게 출력
                        .withResponseDefaults(prettyPrint());   //response 본문을 예쁘게 출력
            }
        };
    }
}
- 설정한 빈을 사용
@AutoConfigureRestDocs
@Import(RestDocsConfiguration.class)
public class EventControllerTests {
★ 주의
이때 다음과 같이 MockMvc를 빌드하는 코드가 있으면 적용되지 않는다.
public class EventControllerTests {
    @Autowired
    private WebApplicationContext ctx;

    @Rule
    public JUnitRestDocumentation restDocumentation = new JUnitRestDocumentation();

    @Before
    public void setup() {
        this.mockMvc = MockMvcBuilders.webAppContextSetup(ctx)
                .addFilters(new CharacterEncodingFilter("UTF-8", true))  // 필터 추가
                .apply(documentationConfiguration(this.restDocumentation).operationPreprocessors()
                .alwaysDo(print())
                .build();
    }
REF
Spring Rest Docs를 이용한 API 문서 만들기
https://huisam.tistory.com/entry/RESTDocs
